You can connect SQL Anywhere databases in Exportizer using these ways:
1. Opening through FD interface. Select FD interface, click DB2, then fill needed database parameters.
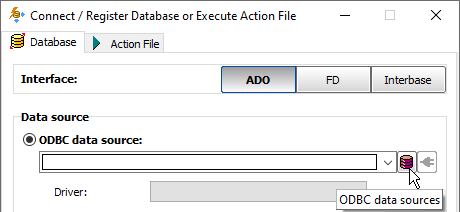
2. Opening through ODBC DSN. Create (if it does not exist yet) an ODBC DSN of the corresponding type using Windows ODBC Data Source Administrator, and point it to your database. Then select ADO or BDE interface, choose ODBC data source option and then select the needed ODBC DSN from the drop-down list.
3. Opening through connection string (interface: ADO). Select Connection string option and write a connection string. This way is the most flexible one because it allows to specify many additional parameters in the connection string and override standard Exportizer connection behavior. But it is recommended basically for advanced users. Here are basic connection strings (more examples and details can be found in the Internet):
Provider=ASAProv;Data source=myASADatabase; (Adaptive Server Anywhere OLE DB Provider must be installed)
Driver=Adaptive Server Anywhere 7.0;ENG=server.database_name;UID=myUsername;PWD=myPassword;DBN=myDataBase;LINKS=TCPIP(HOST=serverNameOrAddress); (Adaptive Server Anywhere ODBC Driver must be installed)
Attention
- This database type is supported only in Exportizer Enterprise and Exportizer Pro (the latter one can open such databases via ODBC only).
- Adaptive Server Anywhere client must be installed. The bit-version of it (32 or 64) must match the bit-version of the application.
- When choosing the ODBC option, please make sure the corresponding ODBC driver installed and the bit-version of it matches the bit-version of the application (32 or 64).
Notes
- Each Exportizer edition has both 32-bit and 64-bit versions. You can install both and use them depending on what type of database you need to work with.
- You can invoke the ODBC Data Source Administrator directly from Exportizer when it was launched in administrator mode:

See also


